
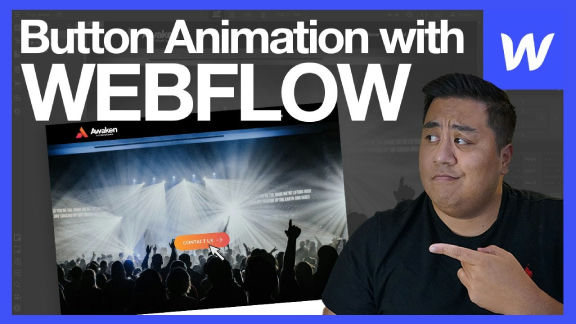
How to Create an Animated Button in Webflow without Interactions


Tutorial tags
Description
In this video, we learn how to create a simple button animation you can use for your next website project! Create it today on Webflow!
Overview
RR Abrot's video tutorial focuses on using backgrounds and transitions to add a gradient and animation to a button in Webflow.
To begin, the tutorial covers using background properties in the Webflow designer to add a gradient to a button element. This involves selecting the button element in the designer, and then accessing the background properties in the style panel on the right. From here, the tutorial shows how to use the gradient options to create a gradient with multiple colors, and adjust the direction and angle of the gradient as needed.
Next, the tutorial covers adding transitions to the button element to create animations. This is done by selecting the button element in the designer and then accessing the transition properties in the style panel. The tutorial shows how to use the transition properties to create a variety of different animations, such as hover effects and button presses, and adjust the duration and easing of the transitions to create the desired effect.
Overall, the tutorial provides a comprehensive overview of how to use backgrounds and transitions to add a gradient and animation to a button in Webflow. By following the steps outlined in the tutorial, users will be able to create visually appealing buttons for their Webflow projects.
Resources
Transcript
what's up everyone on today's video we
were to learn how to make a pretty
snazzy button animation that looks
something like this on one of my
favorite tools called web flow coming
right up
[Music]
what's going on everyone I know I missed
last week I was out on vacation with
family I had a great time with them got
to see my niece graduate from high
school it was all different you know
with the drive through graduation it was
unique but I'm glad that her school made
a special memory even with this whole
coronavirus situation it's weird it's
different we are making the best out of
the situation that's awesome but hey if
you're just tuning in my name is RR
brought and I'm the founder and creative
director at abroad creative a design
agency that's focused on helping
faith-based ministries and nonprofit
organizations but on Instagram and on
YouTube I love to teach about the
process and the business of web design
pretty much how you can make websites
and how you can make a living making
websites and lately I've been enjoying
and giving some tips and tricks on using
one of my favorite platforms which is
web flow and today we're going to learn
how to make a simple button animation so
let's hop right into it this is actually
a project that I did a couple of weeks
ago I worked on this menu animation
right here and if you want to go ahead
and see that here I'll show you real
quick if you want to go ahead and see
how to do that click the link I believe
it will be there all right click that
link and you'll take you to the videos
you can see how I did a body animation
menu and got a good feedback from that
that's awesome so we're gonna go ahead
and add a button here this is our header
and we're gonna add our call to action
what I want to do right now is I'm gonna
add a container in this section and
we're gonna go ahead and just call this
header container always guys always
remember please name your classes and
containers are really cool because
they're automatically I believe nine
hundred pixels wide and if you if you're
okay with that if your kid kind of
thinner it's cool together because it's
kind of responsive already and it makes
it easier for you now of course you can
just go ahead and make your own
container just make a dip but I digress
so we'll go ahead and we'll put a margin
up we'll make this we'll put the button
a little bit lower so let's add some 200
pixels oh that's not the way to go it's
actually what we'll do is we will add a
padding here I'm sort of pixels there
you go let's make it actually 400 all
right we're gonna add our button right
here so we'll go ahead load to go down
here there get myself out of a add
button right there and we're gonna do
that we're gonna put this in the middle
so I'm gonna put margin auto left margin
auto right that did not work we're gonna
go ahead and do this I'm actually we'll
just Center everything there you go all
right so we're gonna click this button
now I don't like the styling
particularly of this button I want to
make it big I want a big bigger I wanna
make it bolder I kind of particularly
like some rounded corners here and there
so what we'll do is we'll go ahead and
add some more padding make it 15 on top
15 on the bottom and let's do 30 on this
side you don't let's do 40 on the sides
there okay we're gonna make the text
into let's pick let's pick some them
match what the fun is this this is a lot
Oh so let's go ahead and pick lotto as
well and let's make the text a little
bigger that looks pretty good
make a height of 30 so pick this button
text and let's go ahead and make this
all caps and let's call it contact us
now button this generally I like to add
a little bit of spacing between the
letters so this maybe add one pixel of
spacing that looks good
I will changes these colors we'll go
ahead and make this like an orange just
color to match the logo that looks great
should we add a gradient oh we feeling
fancy add a gradient let's do it it's
not a gradient that's not so good to me
I'm gonna add a gradient going this way
let's add a little little gradient
action oh there we go
that's what talked about that stuff
right there love it and we'll add some
rounded corners we're gonna make this so
now we have our button one last thing
I'm sorry I know you guys probably annoy
to me let me add a shadow will that work
yes umm like I said if we're gonna do
something it's make it nice right okay
here we go that's too let's add some
Blair yes sir that's it
alright so now we have our button what
we're gonna do actually you know what
this some words is too big
[Music]
okay so now actually because we're gonna
put an arrow we might need to add some
space on the sides so now that we have
our button what we want to do is that
when it hovers there's gonna be an arrow
that that will slide from the from the
outside and slide in to the left and
this one will move a little bit to the
left so what we want to do is we want to
add a background during hover and in
order for us to get that arrow I'm gonna
go I'm gonna go ahead I don't want to
make my own arrow because I am lazy and
remember don't work hard work smart
right so I wouldn't recommend this space
called icon finder and I try to do that
on all my videos whenever I put up a new
video
last time I recommend in Lahti animation
comm I recommend I can icon finder calm
but my favorite places to find icon so
we're gonna go ahead and put right arrow
because that's what we want right that's
what we would right arrow and let me see
here now it looks good this one looks
pretty good I think we'll go ahead and
use that now it's black we want it to be
white I can go ahead and put it on
Photoshop or illustrator and make it
white but it's actually easier way which
is really cool go ahead and go to SVG
actually not SVG there you go right here
go ahead and go to open in icon editor
and what we're gonna do real quick is we
are just going to click this and make it
white there you go now download this
icon as an SVG and there you go you've
got your icon right there so we're gonna
go back to web flow and we are gonna go
to assets and we are put this right here
sample I am now that we are back from
our icon finder we have our icon ready
go go ahead and click this element and
you're gonna click this side right here
this arrow these are the different
elements that you can pick that you can
modify your element with so we want to
click
and so that when we hungry we have a
kind of a cool animation thing going on
go to go down and go to background so
what we're going to do is we're going to
add an arrow to the background okay
check this out so we're go ahead and
click that click the arrow button right
here
and we're gonna choose an image and the
SVG that we just downloaded we're gonna
go ahead and put that there right now as
you can see it's tiled it's multiple we
don't want that so what we're gonna do
is we're gonna on the tile part just
click X because we just want one arrow
okay now we want to make it a little
smaller that is way too big no Red Robin
I don't need that now that's actually
that's a good size is it not okay so
let's go ahead and put this in the
middle one in the middle maybe in the
right now this is very very important I
forgot to backtrack this so let's
actually go back to the state none okay
and we're gonna add this again we're
gonna add the arrow as well same thing
we want this arrow we want it
I believe you made it 30 pixels now by
the way you want to make sure this is
exact okay you don't want to mess it up
so you want to make sure exactly we'll
put it right here so let's check it real
quick button hover good oh that's
pressed hover good now what we're going
to do is this whenever it's on the
regular state not the hover state so
this is very key right here that's very
important but you my on that what we're
gonna do is we're gonna click this
background icon we're gonna make it
actually instead of a hundred percent
left we're gonna make it a hundred fifty
percent left and notice it's gone
actually it's not gone it didn't
disappear is actually kind of somewhere
around here
it's out of the element and it's not
showing and what we wanted to do is if
you notice on hover so in button on the
regular one it is 150 percent but on
hover it is at a hundred percent because
now no co sudden when you hover it shows
up
right now we don't wanted to just show
well first of all we don't want it there
what we want is for it to move a little
bit to the left so it's really simple on
the hover state make sure you always
click that ok on the hover state we want
to make it maybe a percent let's try
that a little too much as we 90 percent
let's do 85 now as you notice when you
hover the arrow pops up right because
that is the arrow that we put now to
contact us we want it to nudge a little
bit to the left so what we're gonna do
is actually fix the padding now make
sure you remember this whatever padding
you add on the right side you subtract
it from the left side because you don't
want the math to mess up because then
what happens is your button instead of
instead of your words just moving your
button will resize and you don't want
that okay so let's say we put this at 35
and then we're gonna go ahead so we
subtract 250 so we're gonna have to take
this so we're gonna make that 65 so
notice now pops up there okay
now just a kind of pet peeve I feel like
the arrow is a little too big what do
you guys think I think it is too big
let's fix that a little bit let's make
it 25 pixels what do you say what do you
say now I'm hovering I do what I'm both
now because if we didn't a while ago
would have been better but there you go
okay that looks a lot better doesn't it
so now don't kick this out
right okay now what we did is on so we
kind of messed up a bit so we did it on
button so let's go back to this being 50
and this being 50 but on hover we
changed the padding this being 35 so we
subtracted 35 and then we added also we
add subtracting 15 and we added 15 and
now check this out so when we hover it
becomes the type of thing we want now
final thing
and this is all you got to do and we're
done so let's crawl all the way down
here and go to transitions click the
plus button and we're going to go ahead
and do all properties so that everything
has a transition and let's try to do it
400 milliseconds and then see it there
you go
so we'll go ahead and check it out over
here and now you have it so there you
have it cool button animation that you
can apply right away on your next
website what that's it for today guys
I hope you learned something from that
video if you did would you be someone
really cool and click that like button
that would really help me out and also
consider subscribing we're coming out
with weekly content about web design and
even tips and tricks about some of my
favorite web design platforms like figma
sketch and also one of my favorite ones
which is web flow if you have any
questions comment them down below I
would love to answer them I may not know
everything but I will do my best to help
someone out there well that's it for
today see you next time peace
Related tutorials


Learn how to create a member profile page that can be edited by your members using Webflow, Zapier and Airtable
How to build a full fledged member directory site with only no-code tools Webflow, Memberstack and Parabola.


Learn how to connect Webflow forms with Airtable & Zapier. Learn how to integrate the forms, create a review process in Airtable for approval, and then update Webflow CMS automatically.

Learn how to populate Webflow multi-reference CMS items inside of Webflow using Airtable and Zapier

A quick and dirty guide to creating an e-learning platform using Webflow, Memberstack, Airtable and Zapier.

More from author
In this video, we learn how to create a simple button animation you can use for your next website project! Create it today on Webflow!